
Layout 6 - Brochure
Hey there, creative folks! Welcome to today's design adventure with LYH Studio. In this step-by-step tutorial, we're diving into the world of tri-fold brochure design using Adobe InDesign. But wait, before we get all 'designy,' let's have a moment of solidarity - who else has shed a tear or two over those unruly layouts? We get it! But fear not, because today, we're going to take the complexity out of brochure design, break it down into easy-to-follow steps, and sprinkle in some of our own creative flair. So, grab your favorite font, a splash of imagination, and let's make your tri-fold brochure uniquely yours!
General Document Setup
Standard Letter 8.5”x11” portrait sheets
2 pages, with “facing pages” NOT checked
Start # = 1
Columns 1, column gutter 0.1667in
Margins = 0.25 in. all sides
Please watch the first 1:30 minutes for important information about how we are laying out this Brochure!


Step 1: Create Guides for Folds
Go to "Layout" and select "Create Guides."
Set the guides at 0 inches and create three columns.
These guides help you visualize where the folds of the brochure will be.
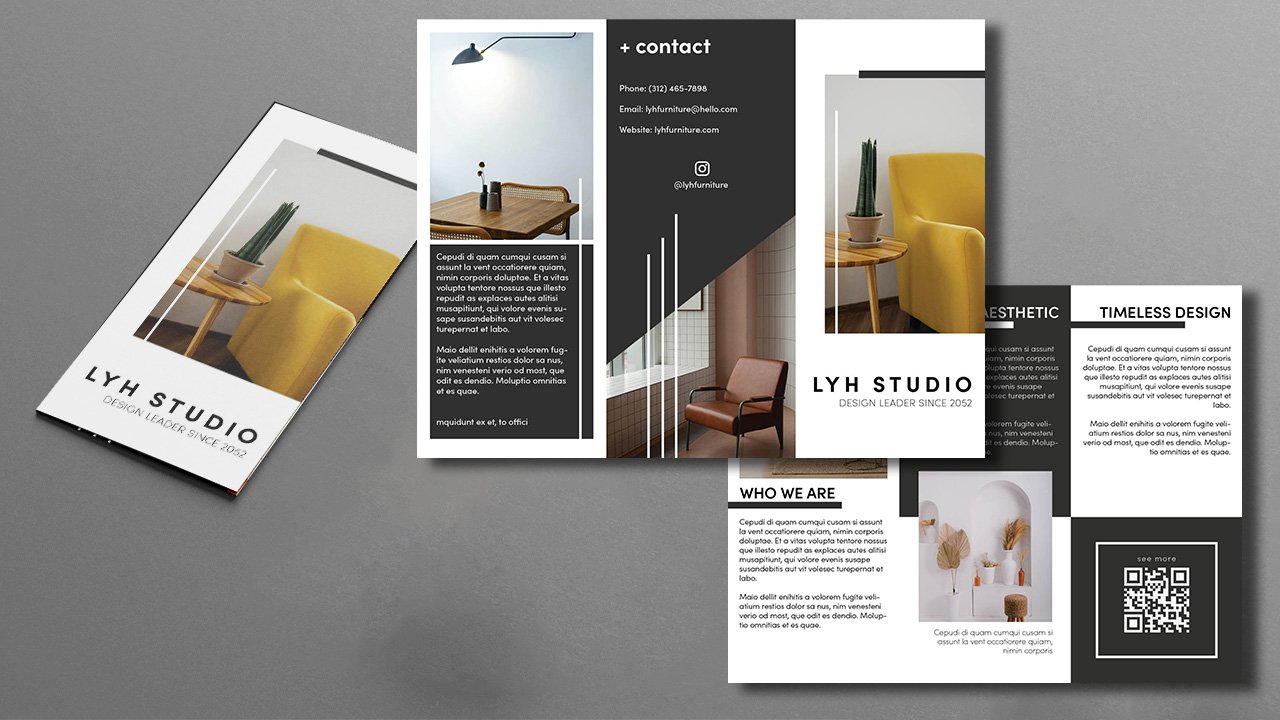
Step 2: Design the Cover Page (Page C)
Begin with the cover page. Add a captivating title and subtitle.
Here I am using Sofia Pro Bold 24pt font with 200 in tracking for the title and Sofia Pro Light at 14pt font with 75 tracking for the text underneath.
Adjust the font size, tracking (letter spacing), and alignment to achieve a modern, sleek look.
Place an image on the cover and use the fitting tool (Ctrl+Shift+Alt+C) to fit it within a frame.
Add decorative design elements using rectangle tool (M).
Step 3: Create a Contacts Page (Page B)
Design the contacts page, which is the last page seen when flipping the brochure.
Create a visually appealing shape, like a triangle, to house contact information.
I first used the rectangle tool (M) to create a rectangle.
Then I use the Eyedropper tool (I) to sample the color that we used on the first page to keep everything consistent.
I followed that up by using the Direct Selection Tool (A) to select the points at each of the corners of my rectangle and dragging them to to produce a shape I want.
Add social media links, phone number, email, and website details.
Sofia Bold 24pt for title and Sofia Regular 12pt for body text.
Use consistent fonts and white text on a dark background for readability.
Step 4: Design Inner Page (Page A)
For the third page, consider showcasing your mission or relevant content.
Create a picture frame (F) and insert an image.
Add a title and text, aligning them carefully.
Maintain a visually balanced design by incorporating rectangles as design elements.
Step 5: Design Inner Page (Page D)
Page D should complement Page A since they are seen together.
Design a picture frame (F) for an image.
Use the same title style but customize the content.
Create design elements like rectangles to maintain a cohesive look.
Step 6: Design Inner Page (Page E)
Continue with the design for Page E, the back of Page D.
Create a picture frame (F) for another image.
Keep the title consistent in style and customize the content.
Here I also created a captions text using Sofia Pro Ultra Light at 12pt font.
Maintain design consistency with rectangles or other design elements.
Step 7: Add Content and QR Code (Page F)
The final page, Page F, can contain additional text or information.
Consider using a QR code to direct readers to a website.
In Adobe InDesign, go to "Objects" and select "Generate QR Code" to create a QR code linked to your website.
Insert the QR code and style it to match your design.
Step 8: Final Adjustments and Review
Review your entire brochure for consistency, alignment, and aesthetics.
Ensure that all text is legible and images are properly fitted.
Make any necessary adjustments to font sizes, colors, and design elements.
Step 9: Export and Save
Save your InDesign project.
Export the brochure as a PDF or another desired format suitable for printing or digital distribution by heading to the top and going under “File > Export”.
And there you have it, your very own tri-fold brochure masterpiece! Remember, design isn't just about following rules; it's about expressing your individuality. So don't be afraid to add your personal touch, experiment with fonts, colors, and shapes, and let your creativity shine through. If you've enjoyed this design journey. Until next time, keep designing, keep creating, and always be uniquely you. Cheers!